In order to access your email on a mobile device or with software like Microsoft Outlook, you must be sure that the settings that you have instituted are correct.
If your settings are not correct, your email will not work and you won't be able to access it. It is imperative that you are sure all of your settings are set up the way your Internet Service Provider dictates.
Normally, most email apps like Microsoft Outlook will automatically configure email server settings. If your server settings are not automatically configured, this step-by-step guide will help you get your email working properly.
Server Settings for Outlook or Office 365 for Business Email Accounts
When setting up your Outlook.com email account (this can consist of hotmail.com, live.com, or msn.com accounts), you will be asked for server settings. Follow these few steps.
Outlook Accounts
- Navigate to eas.outlook.com to find your incoming server settings page.
If your Outlook account requires a POP server, navigate to pop-mail.outlook.com. For IMAP servers, you’ll want to navigate to imap-mail.outlook.com.
- For outgoing SMTP server settings, navigate to smtp-mail.outlook.com
- At this point, you will be required to enter a port number or search for a port number. For IMAP email servers, the import number is 993.
- For POP email servers, the import number is 995.
Once you enter into the port number for import emails, you will need to enter or search for the outgoing port number.
The outgoing port number for all email servers is 587.
Office 365 for Business Accounts
- Navigate to outlook.office365.com to find your incoming server settings page.
- For outgoing SMTP server settings, navigate to smtp-mail.outlook.com
- At this point, you will be required to enter a port number or search for a port number. For IMAP email servers, the import number is 993.
For POP email servers, the import number is 995.
- Once you enter into the port number for import emails, you will need to enter or search for the outgoing port number.
The outgoing port number for all email servers is 587.
Exchange Mailbox Server Settings
If for some reason you have decided to use an Exchange mailbox as opposed to an Office 365 email, you can follow this step-by-step guide to look up your server settings.
These steps will also help if you are unsure about which type of email you are using.
- You’ll want to sign in to your account using the Outlook Web App.
- Once you have signed into the Outlook Web App, look for the toolbar.
- At the toolbar, you will select "Settings." From there, you will click on "Mail," then "POP and IMAP".
- The server names for POP3, IMP4, and SMTP, as well as any other settings, will be found here on the POP and IMAP server settings page.
Setting up Outlook 2011 for Mac
If you are running Outlook 2011 for Mac, you can follow these step-by-step guidelines to help you set up your email.
- Open up Outlook 2011 for Mac. From the top toolbar, click on “Tools.” Then click on “Accounts” to add an email account to the server.
- You will be taken to the “Accounts” page. From here, you will click on the “Email Accounts” icon.
- Once you click on this icon, another window will pop up where you can enter in all your account information.
In this window you will enter:
- Your name as you would like it to appear
- Your full email address. Example: johndoe@example.com
- Select your server: POP3 or IMAP.
- Enter mail.example.com in the “Incoming mail” (POP3, IMAP) server box.
- Enter mail.example.com in the Outgoing mail (SMTP) server box. As common authentication issues can occur with Outlook, it is strongly advised to use an SSL and port number 465 for SMTP connections, if this is the route you decide to take.
- Enter your full email address once again into the User Name field.
- Enter your email password into the Password field.
- After you have entered in all your account information into the box, you will configure your Outgoing server settings. Do this by clicking on the “More Options” button at the box of the account information box.
For authentication, select “use incoming server info” this will help you avoid any common authentication issues that may come up.
How to Set up Outlook 2013 or 2016
- Open up Outlook on your device.
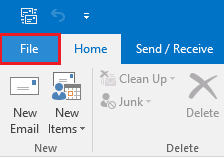
- At the top, you will select the “File” tab.

- From here, look for the “Info” category. Then click on Account Settings from the dropdown menu.
- Once you are in Account Settings, look for the “Email” tab. Then select “New.”

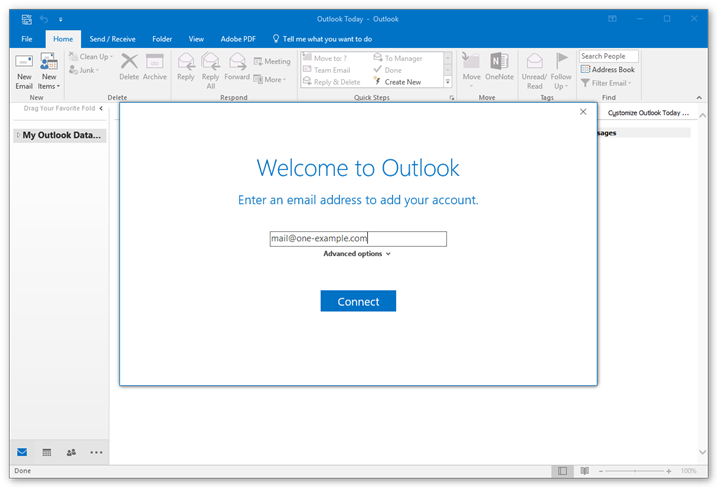
- A dialog box will pop open that will allow you to configure a new email account. Enter all of your information into the dialogue box. In the Your Name box, type your full name.
Included in the dialogue box will be:
- Your full name
- Your full email address
- Your password
- Then your password again
After entering all of this information (and if it is correct), click “Next” to begin the automatic account setup.
At this point, Outlook will attempt to automatically configure your account. If everything runs successfully, the open dialogue box will alert you that your email account was added successfully. You then click “Finish” and “Close”.
Notes
- You may need some information from your email provider when setting up your email. You will more than likely have to set up your email as an IMAP or POP account.
- Your provider will tell you which one your account is compatible with. If any automatic configuration fails throughout this process, the automatic system will try to use an encrypted connection.
- If the encrypted connection also fails, you will be required to set up the email account manually.
If you’re looking for a software company you can trust for its integrity and honest business practices, look no further than SoftwareKeep. We are a Microsoft Certified Partner and a BBB Accredited Business that cares about bringing our customers a reliable, satisfying experience on the software products they need. We will be with you before, during, and after all the sales.
That’s our 360 Degree SoftwareKeep Guarantee. So, what are you waiting for? Call us Today on +1 877 315 1713 or email sales@softwarekeep.com. As well, you can reach us via Live Chat.