
Seeing the “This Device Cannot Find Enough Free Resources to Use (Code 12)” error in your Device Manager may scare you at first glance. Don’t worry — we’re here to help. In this article, you can learn how to fix the error and restore your devices on Windows 10 with our step-by-step troubleshooting guide.

Contents
- Why do I get Error Code 12?
- How to fix Error Code 12
- Method 1. Use the Hardware and Devices Troubleshooter
- Method 2. Perform a Network Reset
- Method 3. Update your BIOS
- Method 4. Delete the pcmcia.sys driver file
- Method 5. Update or roll back the problematic driver
- Method 6. Update Windows 10 to the latest version
- Method 7. Perform a system restore
- Final thoughts
Why do I get Error Code 12?
Windows 10 is the latest operating system from Microsoft, but it’s still far from perfect even years into release. Amongst some of the known issues is the “This Device Cannot Find Enough Free Resources to Use” error, also known as Error Code 12.
Most commonly, this error appears when a user assigns two individual pieces of installed hardware to the same input or output port. Alternatively, the error can also occur when multiple devices are allocated to the same Direct Memory Access (DMA) channel.
Luckily, just like most issues with the system, Error Code 12 can be fixed with ease. This article has been updated with the best methods to troubleshoot your computer and remove the said error.
How to fix Error Code 12
Method 1. Use the Hardware and Devices Troubleshooter
An easy fix can be applied by simply running one of Windows 10’s many integrated troubleshooters. This tool aims to quickly identify and fix issues with your device, making the process faster and more automated than finding a Windows 10 support team member.
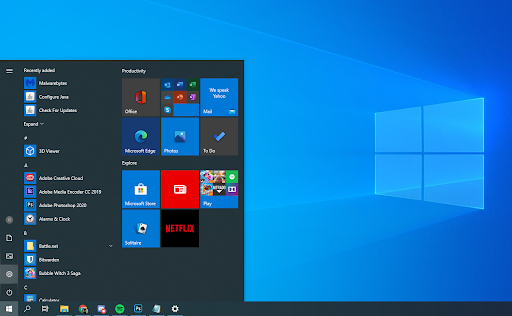
- Click on the Start menu in your taskbar. This icon has the Windows 10 logo on it. If you’re not familiar with the Windows 10 interface, we recommend reading the How to Get Started with Windows 10 article on our website.
-
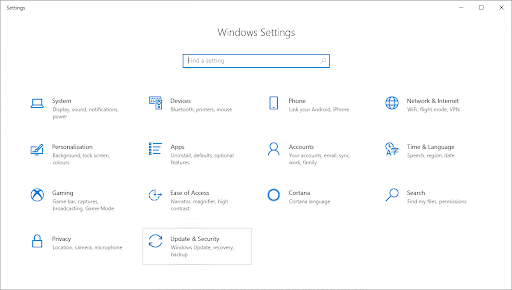
Select the Settings icon, indicated by a gear. Alternatively, you can use the Windows + I keyboard shortcut to reach this application quicker.
-
Click on the Update & Security tab.
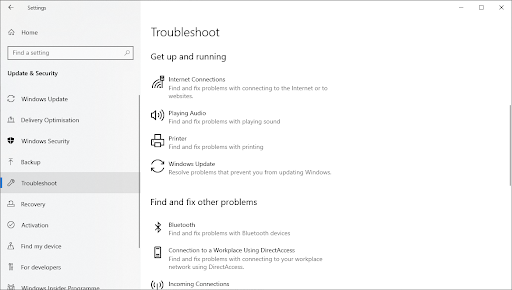
- Scroll down and choose Troubleshoot from the menu on the left-side pane.
-
Look for the Hardware and Devices troubleshooter, then select it with your mouse and choose to Run the troubleshooter.
- Follow all of the on-screen instructions to identify any issues with your touchscreen. If anything is picked up, select the appropriate action to fix or get more information about the error.
Method 2. Perform a Network Reset
- Click on the Start menu in your taskbar. This icon has the Windows 10 logo on it.
-
Select the Settings icon, indicated by a gear. Alternatively, you can use the Windows + I keyboard shortcut to reach this application quicker.
-
Click on the Network & Internet tile.
-
Stay on the default Status tab. Scroll down until you see the very last link, called Network reset. Click on it to initiate the process.

-
Read the warnings about the process, then click the Reset now button if you wish to proceed.
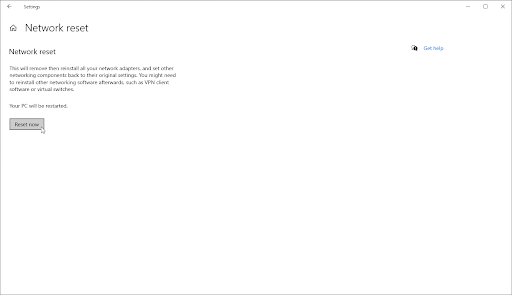
- Your computer will restart and Windows will automatically begin the reset process. Once everything’s back up, check if the error is still present on your device after resetting your network.
Method 3. Update your BIOS
Simply updating your BIOS to the latest version may fix the issue at hand. This can fix a number of system errors, however, we recommend making a backup of your important files in case of any unexpected errors or events, such as a power shortage or blackout.
-
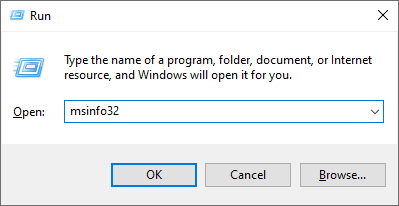
Press the Windows + R keys on your keyboard at the same time to bring up the Run utility.
-
Type in “msinfo32” without the quotations marks, then hit the OK button. This is going to open the System Information center in a separate window.
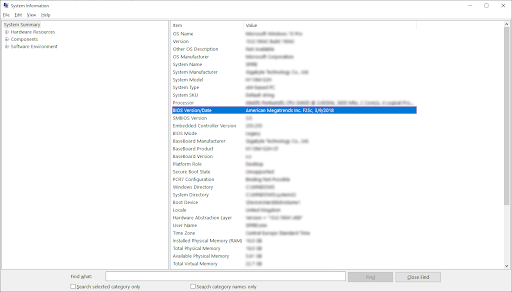
- Locate the BIOS Version/Date line and check what your system is currently running with.
- Visit the manufacturer’s website and look for an updated version of your BIOS. If so, simply download and install it onto your device.
Method 4. Delete the pcmcia.sys driver file
A PMCIA card could be the reason behind your issue with the “This Device Cannot Find Enough Free Resources to Use” error. If you have this card installed into your PC or laptop, follow the steps below.
-
Open the File Explorer and navigate to the following path: C:\WINDOWS\System32

-
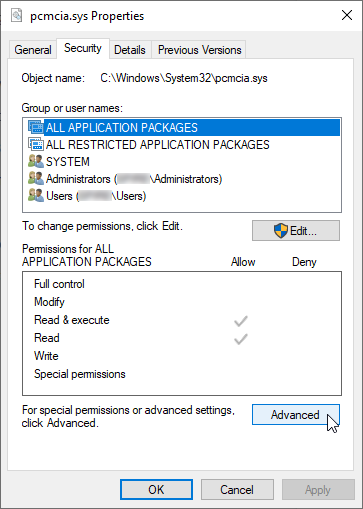
Locate a file named pcmcia.sys, then right-click it and choose Properties from the context menu.
-
Switch to the Security tab, and then click on the Advanced button.
-
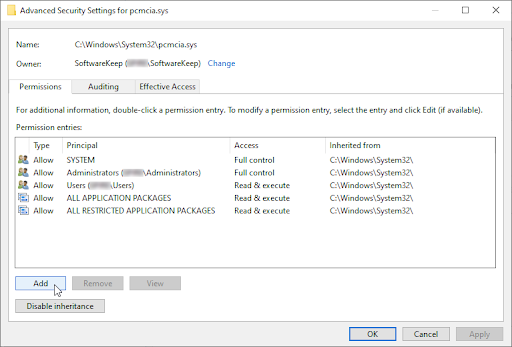
The Advanced Security Settings window will appear. In it, locate the Change link next to the Owner section and click on it once.
-
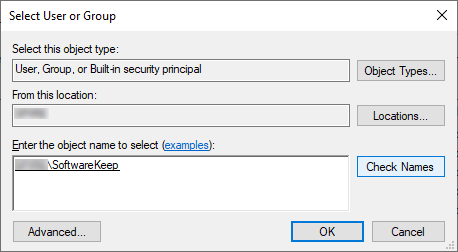
Type in your user account’s name in the Enter the object name to select field, then click on the Check Names button. The system should automatically input your full account name. When done, click the OK button.
-
If multiple matching usernames are found, select the one you’re currently using. Alternatively, you can select the user by clicking on the Advanced button instead of manually typing in the field.
-
If multiple matching usernames are found, select the one you’re currently using. Alternatively, you can select the user by clicking on the Advanced button instead of manually typing in the field.
-
Next, click on the Add button.
-
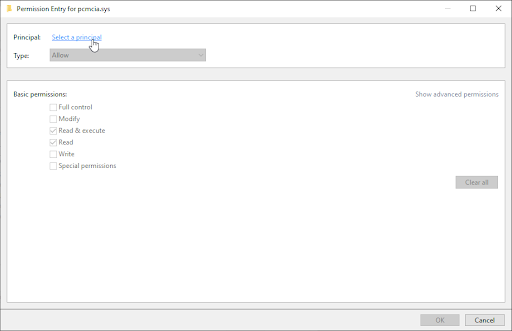
Click on the Select a principal link next to the Principal section. Select your user account using the same method(s) as described above and click the OK button.
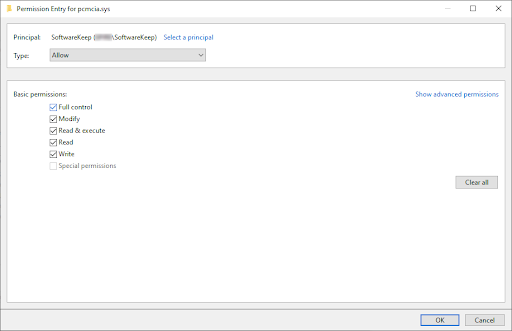
- Place a checkmark in the Full control box under the Basic permissions section. This will allow you to alter the file in any way, and even remove it from your computer.
- Exit all of the Properties windows, and then right-click the pcmcia.sys file in System32 again. Choose the Rename option from the context menu, and change the filename to pmcia.old.sys.
- Restart your device and check if the error is still appearing.
Method 5. Update or roll back the problematic driver
If the issue is caused by a driver, you’ll be able to identify it by taking note of the yellow exclamation mark next to the name of a driver in the Device Manager. If such an issue is found, follow the steps below to update or roll back the driver.
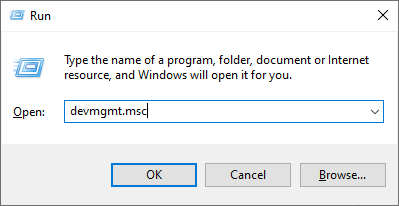
- Press the Windows + R keys on your keyboard at the same time to bring up the Run utility.
-
Type in “devmgmt.msc” without the quotations marks, then hit the OK button. This is going to launch the Device Manager in a separate window.
-
Check if the yellow exclamation mark icon is visible next to any driver. If so, right-click on the problematic driver and choose Properties.

-
A new window will pop up. Here, switch to the Driver tab using the menu on top of the window.
-
Now, you have two options:
- Click Update Driver to get the latest version of the driver software, if one is available. Doing so will download the latest version of the driver software, potentially fixing any bugs and issues.
- Click Roll Back Driver to revert to an earlier, working version of the driver software. In rare cases, updates may cause issues that could lead to Error Code 12.
- After performing the steps shown on screen, check if Error Code 12 is still present on your device.
Method 6. Update Windows 10 to the latest version
Updating to the newest Windows 10 release available to you might fix the error at hand. Performing a system update can fix bugs, bring you new features, patch up security holes, and much more.
Below are the basic steps of updating your operating system. For a detailed guide, check out our How to Update Windows 10 article.
- Click on the Start menu and choose Settings. Alternatively, use the Windows + I keyboard shortcut for quicker access.
- Click on the Update & Security tile.
- Make sure to stay on the default Windows Update tab.
- Click on the Check for updates button.
- If an update is found, click on the Install button and wait for Windows 10 to download and apply the update.
Method 7. Perform a system restore
If all else fails, you can attempt to return to a Windows 10 restore point and essentially reset your PC to a point in the past. Doing so may fix the error you’re experiencing. This can be done easily by following the next few steps.
-
Press the Windows + S keys on your keyboard to bring up the search bar.

-
Type in System Restore.
- Click on Create a restore point from the search results.
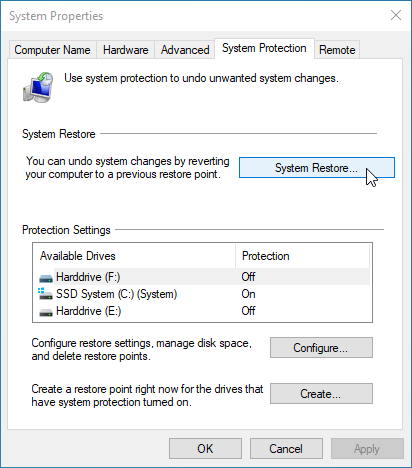
- You should be able to see the System Properties window appear on your screen. Here, simply click on the System Restore button in the first section.
- Click on the Show more restore points option if available. Afterward, select a restore point in the past and click Next.
- Follow the on-screen prompts and instructions to return to your restore point. When done, simply attempt to reset your PC again.
Final thoughts
If you need any further help with Windows 10, don’t hesitate to reach out to our customer service team, available 24/7 to assist you. Return to us for more informative articles all related to productivity and modern day technology!
Would you like to receive promotions, deals, and discounts to get our products for the best price? Don’t forget to subscribe to our newsletter by entering your email address below! Receive the latest technology news in your inbox and be the first to read our tips to become more productive.
Read Also
> How to Fix Disney Plus Error Code 73 [Updated]
> How to Solve Stop Code Memory Management on Windows 10
> How to Fix Error 0xc00d5212 in Windows Media Player