Microsoft Edge has been the default browser in Windows 10 since its release and made its way into the new Windows 11 as well. It’s a solid web browser, fast and easy to use, but some issues with it have given it a bad reputation. One of them is "Can't connect securely to this page."
When you try to load a website and it tells you that you can't connect, then there's usually a problem with your browser or network settings. Luckily for you, we're here to help! In this article, we'll go through how to troubleshoot the "can't connect securely" error and fix it so that any previously inaccessible websites will work again.
This error can be caused by many things, so we’re going to go over how you can fix the issue today and prevent it from happening again in the future!
Table of Contents
- What causes the “Can’t connect securely to this page” error in Microsoft Edge?
- Solved: Can’t connect securely to this page (Microsoft Edge)
- Method 1. Enable older TLS encryption
- Method 2. Enable display for mixed content
- Method 3. Reset your browser data and cache
- Method 4. Automatically obtain DNS details
- Method 5. Change your DNS address manually
- Method 6. Temporarily disable your antivirus
- Method 7. Update or reinstall your network adapter driver
- Method 8. Reset your network configuration
- Method 9. Update Microsoft Edge
- Final thoughts
What causes the “Can’t connect securely to this page” error in Microsoft Edge?
The cause of this error is usually related to your web browser itself. In some rare cases, it could be because of your system or network configuration. Let’s take a look at the possibilities to help you identify what caused this issue:
- TLS encryption in Microsoft Edge. The primary reason for this problem in Microsoft Edge is that it has been configured to utilize an encryption setting that does not match the server.
- TLS 1.2 is disabled in Windows. If you disable TLS 1.2 in Windows, you won’t have access to websites that use TLS 1.2 encryption. In this case, it becomes impossible for the website server and client to establish a connection which leads to an error.
- Your antivirus is blocking the website. Some antivirus applications are notorious for detecting false positives. If the website giving you this error is picked up as a potential threat, your antivirus may block it from being accessed.
- The website has mixed HTTP and HTTPS content. In most cases, if a website you’re trying to visit has both HTTP and HTTPS content mixed, it’ll lead to issues. This can be a cause for the “Can’t connect securely” error.
- Network configuration. Some things may be misconfigured on your computer regarding your network. Some of these small settings can eventually lead to the error at hand. Simply correcting them may help you troubleshoot.
- Microsoft Edge problems. If you recently updated Microsoft Edge, or haven’t updated it in a long time, you may have some problems with accessing certain websites. We’ll help you sort your browser out to make sure it’s in good shape.
Now that we’ve taken a look at some of the possible causes for the “Can’t connect securely” error, it’s time to troubleshoot. Let’s get started!
Solved: Can’t connect securely to this page (Microsoft Edge)
Below are several ways you can fix it when Microsoft Edge shows the “Can’t connect securely to this page” error. All guides include step-by-step instructions to ensure you have an easy way of fixing this problem.
Method 1. Enable older TLS encryption
The first solution requires you to enable specific settings for encryption in Windows. The website you’re trying to access may use TLS 1.2, which isn’t enabled by default in Windows.
To fix this problem, some additional work from your end is needed — but it can be done quicker than you’d expect! The process is pretty simple:
-
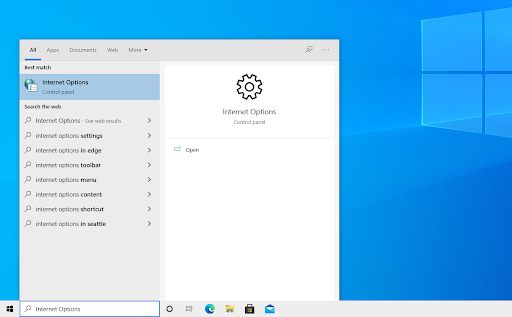
Bring up the Windows Search interface from the taskbar (or by using the Windows + S keyboard shortcut) and look up Internet Options.
-
Switch to the Advanced tab using the menu on top of the pop-up window. Scroll down until you see the Use TLS 1.0 option. Make sure that TLS 1.0, TLS 1.1, and TLS 1.2 are all checked.
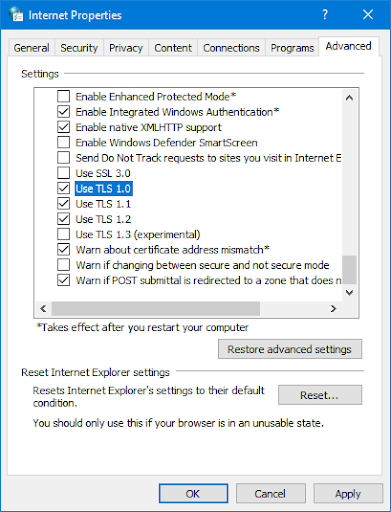
- Double-check that the Use SSL 3.0 option is not checked. This setting is known to cause problems such as the “Can’t connect securely to this page” error in Microsoft Edge.
- Click on the Apply button and reopen your web browser. Check if you’re able to connect to the problematic website.
Method 2. Enable display for mixed content
Another setting that may resolve this problem is allowing display for mixed content, such as HTTP and HTTPS on the same website.
- Bring up the Windows Search interface from the taskbar (or by using the Windows + S keyboard shortcut) and look up Internet Options.
-
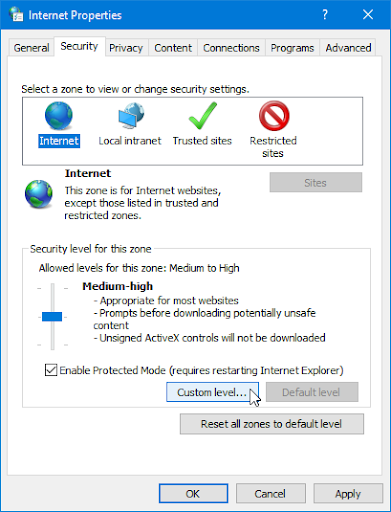
Switch to the Security tab, and then select Internet > Custom level.
-
Scroll down until you see the Display mixed content header. Make sure that the Enable option is selected, and then click OK.

- Try to load the website giving you the error message. Make sure to restart your browser to validate the settings.
Method 3. Reset your browser data and cache
If you have problems with connecting to a website, it could be a result of outdated or incorrect DNS and IP settings. You can manually correct this by following these steps:
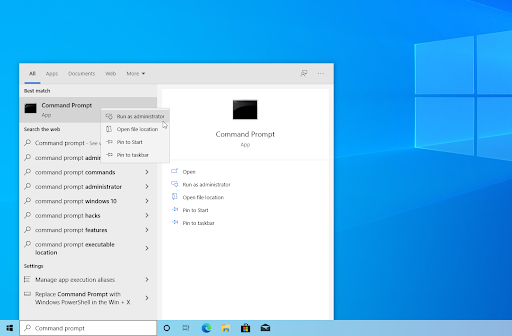
- Open the search bar in your taskbar by clicking on the magnifying glass icon. You can also bring it up with the Windows + S keyboard shortcut.
-
Type Command Prompt in the search box. When you see it in the results, right-click on it and choose Run as Administrator
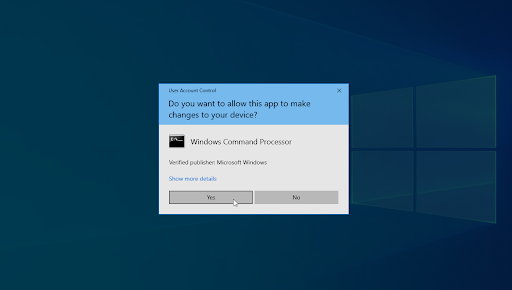
- When prompted by the User Account Control (UAC), click Yes to allow the app to launch with administrative permissions. If you're using a local account that doesn't have administrator permissions, click here to convert your user.
-
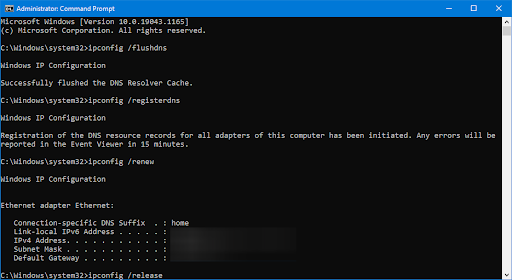
Input the commands below in the following order, pressing the Enter key on your keyboard after each line:
- ipconfig /flushdns
- ipconfig /registerdns
- ipconfig /renew
-
ipconfig /release
- Close the Command Prompt and see if you’re able to visit the website giving you an error previously.
Method 4. Automatically obtain DNS details
DNS server details are important for configuring your network. The information can help you resolve critical errors in the configuration, which is why automatically obtaining them may be the solution for you!
-
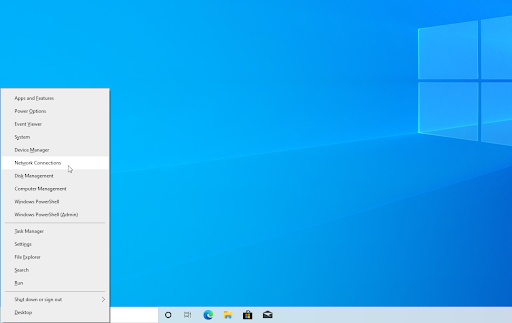
Press Ctrl + X on your keyboard, and then click on Network Connections from the context menu.
-
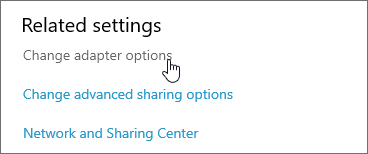
Select your current connection type (for example “Wi-Fi” or “Ethernet”) in the left pane, and then click on Change adapter options on the right pane.
-
Right-click on the connection you’re currently using and select Properties.

-
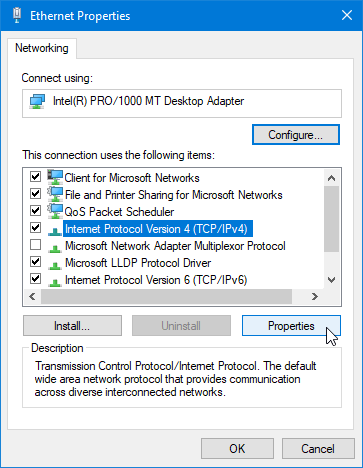
Scroll down until you see the Internet Protocol Version 4 (TCP/IPv4) option. If there’s no checkmark next to it, click on the box once to enable it. Afterward, click on the Properties button to open a popup window.
-
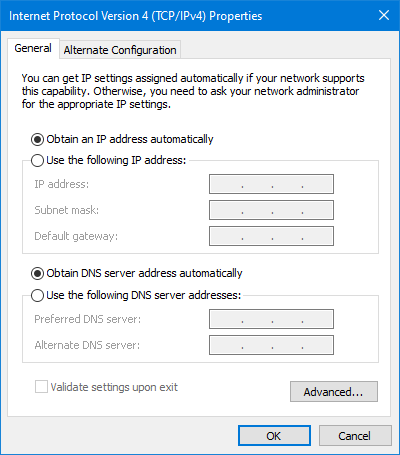
Make sure that you have both Obtain an IP address automatically, and Obtain DNS server address automatically selected. This will make it so your computer will automatically find the correct, possibly working DNS server that’s needed for your configuration.
- Click OK and restart your computer. Check if you’re able to visit the problematic website when the system fully boots up.
Method 5. Change your DNS address manually
This approach is the polar opposite of the former one. If you've previously attempted to acquire DNS information automatically, try manually entering a DNS. You may pick from a variety of public servers, which we'll discuss further down!
- Follow the previous steps to get to your adapter properties:
- Press Ctrl + X on your keyboard, and then click on Network Connections from the context menu.
- Select your current connection type (for example “Wi-Fi” or “Ethernet”) in the left pane, and then click on Change adapter options on the right pane.
- Right-click on the connection you’re currently using and select Properties.
- Scroll down until you see the Internet Protocol Version 4 (TCP/IPv4) option. If there’s no checkmark next to it, click on the box once to enable it. Afterward, click on the Properties button to open a popup window.
- Select Use the following DNS Server addresses. Now, you have some choices for what DNS server you want to use:
- Type 1.1.1.1 into the first row, then 1.0.0.1 into the second row. This will change your DNS to the popular 1.1.1.1 server, which you can read more about by clicking here.
- Alternatively, use Google’s DNS server by typing in 8.8.8.8 as the Preferred DNS server and 8.8.4.4 as the Alternate DNS server.
-
You can also use OpenDNS if you type in 208.67.222.123 and 208.67.220.123 instead.
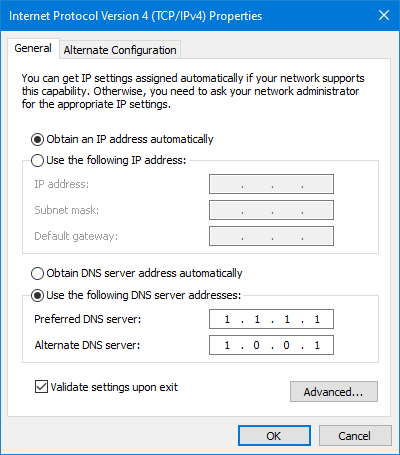
Select the Validate settings upon exit option if you don’t want to restart your computer — otherwise, and then click OK and reboot. See if the changes have helped you restore the website giving you the “Can’t connect securely” error.
Method 6. Temporarily disable your antivirus
Sometimes, your antivirus app can detect other apps as “false positives”, which means that it falsely detects a harmless program as malware. In this case, you need to temporarily turn off your antivirus app, and then try to connect to the website.
-
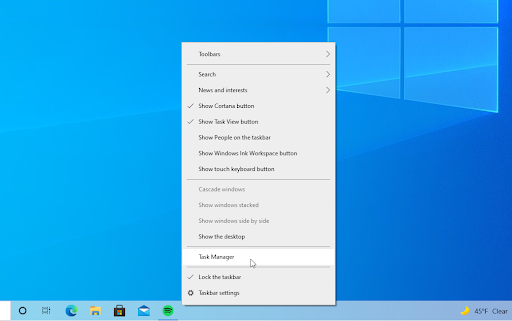
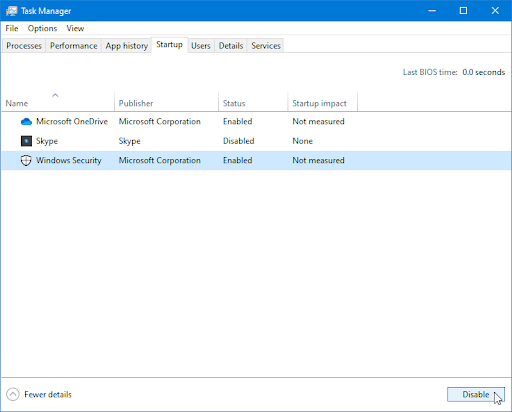
Right-click on any empty space in your taskbar and choose Task Manager from the context menu.
- Switch to the Start-up tab using the header menu located at the top of the window. Here, find your antivirus application from the list and select it by clicking on it once.
-
Click on the Disable button now visible in the bottom-right of the window. This will disable the application from launching when you start your device.
- Restart your computer and see if you’re able to access the website giving you an error. Don’t forget to turn your antivirus app back on afterward!
Method 7. Update or reinstall your network adapter driver
Updating or completely reinstalling your network device may be able to resolve the “Can’t connect securely to this page” problem with your Edge browser. Let’s give it a try:
-
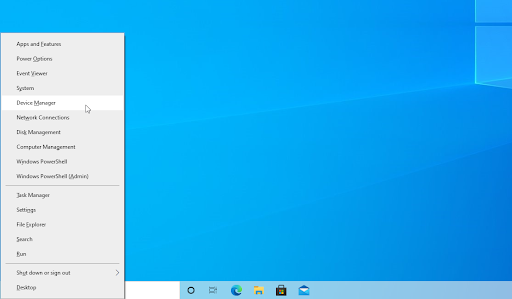
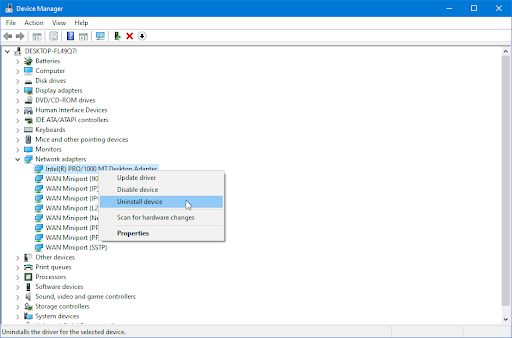
Press the Windows + X keys on your keyboard and click on the Device Manager option from the WinX menu.
-
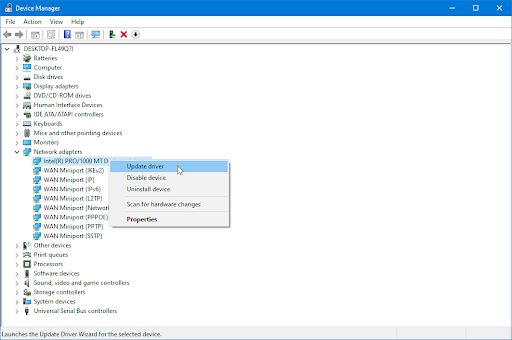
Expand the Network adapters menu by clicking on the arrow next to it. Right-click on your adapter listed in the menu, and then choose the Update driver option.
-
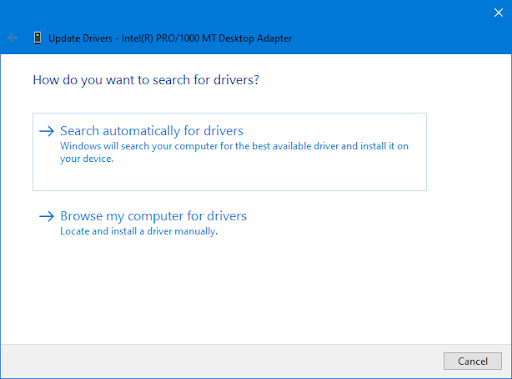
Choose the Search automatically for drivers option and wait for Windows to locate the latest drivers for your adapter. Follow any on-screen instructions to finish the installation.
-
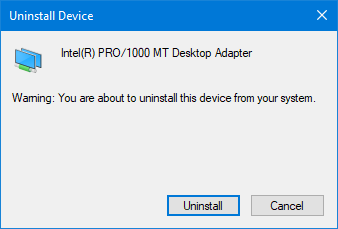
If the update didn’t work, navigate back to the same window in the Device Manager, select your network adapter and choose Uninstall device.
-
Click on the Uninstall button to confirm the action.
-
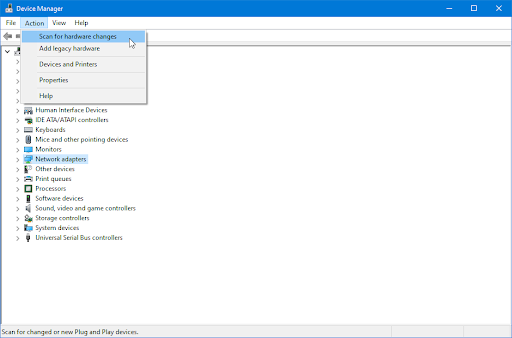
After uninstalling the adapter, navigate to Action > Scan for hardware changes from the toolbar menu. Windows 10 will detect that the network adapter device is missing and reinstall it.
- Restart your computer and see if you’re able to connect to the internet now.
Method 8. Reset your network configuration
Resetting your Winsock library will help get rid of any problems and restore the default settings on Windows Sockets API so that everything is running smoothly again!
- Open the search bar in your taskbar by clicking on the magnifying glass icon. You can also bring it up with the Windows + S keyboard shortcut.
-
Type Command Prompt in the search box. When you see it in the results, right-click on it and choose Run as Administrator.
-
When prompted by the User Account Control (UAC), click Yes to allow the app to launch with administrative permissions. Input the commands below in the following order, pressing the Enter key on your keyboard after each line
- netsh int ip set dns
-
netsh winsock reset
- Close the Command Prompt and see if you’re able to establish a connection to the internet. If you’re still seeing the “Can’t connect securely to this page” message there are a couple more things you can try.
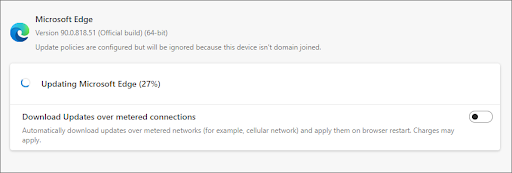
Method 9. Update Microsoft Edge
If nothing seems to work, it may be time to update your browser. Microsoft Edge is constantly worked on and improved, so a new update may have addressed the problem you’re having right now with the “Can’t connect securely” error message. After installing the new update, check if you’re still having trouble connecting to a certain page.
- Click on the menu button, and then hover on Help and feedback in the context menu. Click on the About Microsoft Edge option.
- Edge will start to check for updates, and if a new update is found, it will download them automatically.
- After the download process is completed, click on the Restart button. Edge will launch with the new update applied.
Final thoughts
In this article, we’ve covered how to troubleshoot the “Can’t connect securely to this page” error and fix it. From here, you should be able to access websites without any issues!
If you have questions about other tech-related topics that are not addressed in this post, please feel free to reach out to us using one of the methods mentioned at the bottom of this page. We hope this was helpful for you and wish you a happy browsing experience from now on!
Our team of experts is always available to answer any questions or concerns! Contact us by email, live chat, and phone every day of the week.
Get early access to our blog posts, promotions, and discount codes when you subscribe to our newsletter! You’ll get the best price on all products we offer at SoftwareKeep. Want more articles from us? Check out our blog page for more tech articles updated regularly!
Recommended articles
» How to unblock Adobe Flash Player in Microsoft Edge
» Slow Internet on Windows 10? Here’s How To Solve It
» How to View Your Saved Passwords in Microsoft Edge
For more articles, check out our Blog and Help Center!