Are you experiencing a slow internet connection on Windows 10? We’re here to help you fix it. In this guide, we’ll go over 9 effective solutions for speeding up your internet on a Windows 10 operating device. Our methods work on both desktop computers, as well as laptop devices.
Improve your network performance and speed to eliminate one of the most frustrating issues one can encounter. This is why we’re here to help you fix the slow internet on Windows 10, whether you use Ethernet or Wi-Fi.
Tip: If you’re not familiar with the Windows 10 interface, we recommend reading our How to Get Started with Windows 10 article before troubleshooting.
Table of Contents
- Method 1. Disable the Peer to Peer (P2P) Update feature
- Method 2. Exit background apps
- Method 3. Use CCleaner
- Method 4. Change your DNS server
- Method 5. Adjust the Network Bandwidth settings
- Method 6. Turn off Large Send Offload (LSO)
- Method 7. Disable/Enable the Window Auto-Tuning feature
- Method 8. Temporarily disable your firewall
- Method 9. Update the network adapter drivers
- Final thoughts
Fixed: Slow internet on Windows 10
Method 1. Disable the Peer to Peer (P2P) Update feature
Slow internet speeds are often caused by misconfigured system settings. Something that often messes with your internet connections is a feature called Peer-2-Peer update.
The Peer to Peer (P2P) update feature is quite controversial amongst Windows 10 users. While it aims to make updating your computer easier, it often hogs a large amount of bandwidth and slows down your internet. Luckily, you can disable it.
-
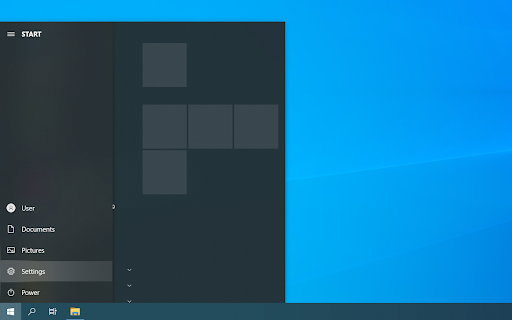
Click on the Windows icon in the bottom left of your screen to bring up the Start menu. Choose Settings, or alternatively use the Windows + I shortcut.
-
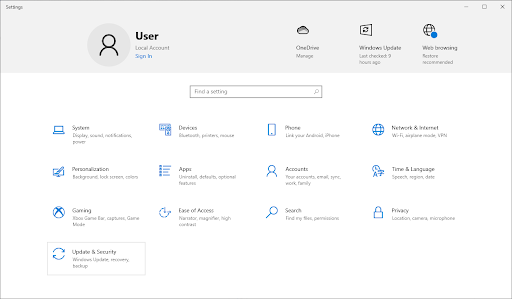
Click on the Update & security tile. This is where you can find most of your Windows Update settings.
-
Switch to the Delivery Optimization tab, and ensure that Allow downloads from other PCs is turned Off.
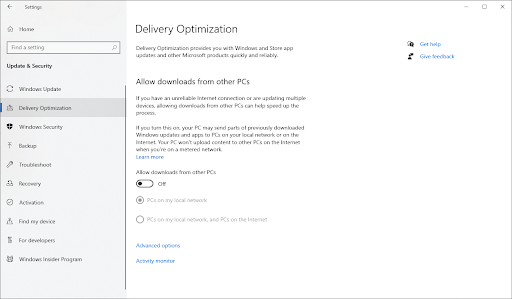
- After turning this feature off, you’ll no longer use your internet to send and receive updates from other computers. You should be able to notice some internet speed improvements.
Method 2. Exit background apps
Some applications use your bandwidth even when you’re not using them, making your network performance much worse. Such software running in the background can easily give your internet slow speed. Here’s how you can completely close these apps.
-
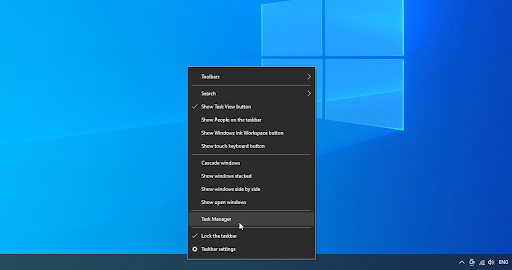
Right-click on your taskbar, and then choose Task Manager from the context menu.
-
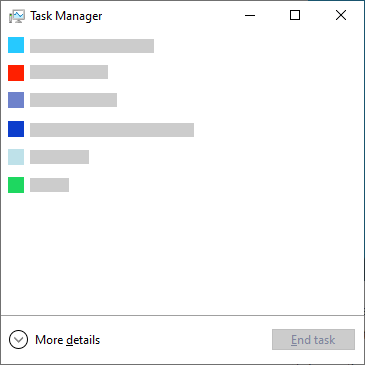
If the Task Manager launched in compact view, click on the More details button to expand it.
-
Stay on the Processes tab, and then click on the Network heading to sort applications based on their network usage. You can easily see which applications are currently using your network and exit them if they’re not needed.

-
Next, switch to the Startup tab. Check if any startup applications have a high impact on your computer, and disable them promptly.
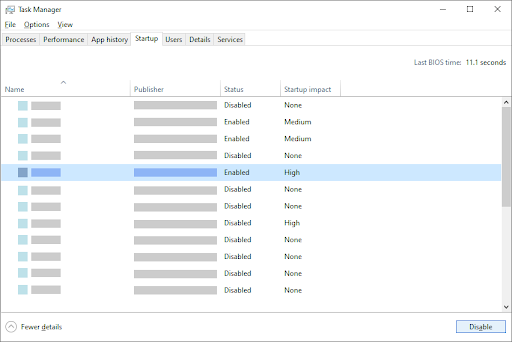
- Restart your computer and check if you can see any improvement in your internet speeds.
Method 3. Use CCleaner
CCleaner is an application used for many different things. It’s able to clean your computer from temporary junk files, browser data, and even helps you with keeping your Registry keys organized.
Here’s how to download and use CCleaner for internet speed optimization.
- Download CCleaner. Make sure to only get the software from the official website! Unauthorized downloads may be outdated or contain malware and other malicious code.
-
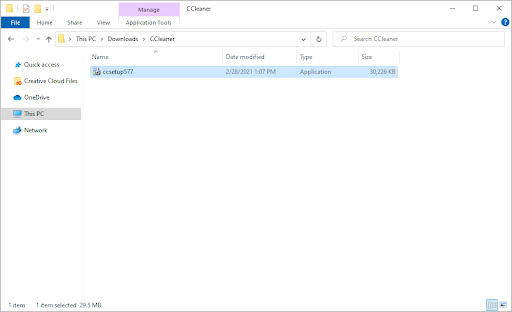
Click on the setup file you just downloaded to launch the installation wizard. Simply follow the on-screen instructions to install CCleaner onto your device.
-
Launch CCleaner using a created shortcut or the search bar.

-
First, select Custom Clean from the left-side pane. You can uncheck any options that you don’t want to delete before beginning the cleaning.
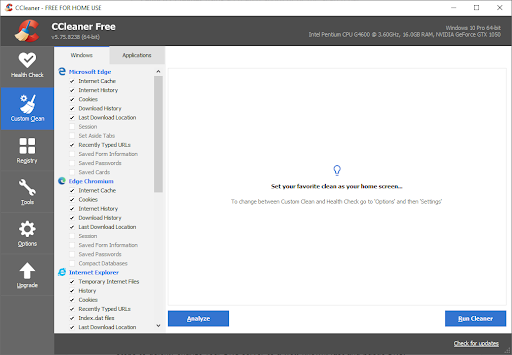
- Click on the Run Cleaner button and wait until the cleaning is complete.
-
Switch to the Registry tab. Click the Scan for Issues button and wait for CCleaner to identify any Registry errors. If any issues are found, click on “Fix selected issues…”
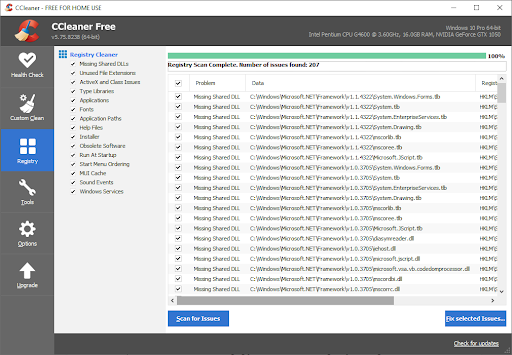
- Restart your computer. You should be able to notice an internet speed boost if CCleaner was able to fix related issues.
Method 4. Change your DNS server
A quick fix to this issue is changing your DNS server. By doing so, you can go around limitations and might even get a better internet speed on your device. Here are the steps to quickly change your DNS server to a well-known, fast, and public DNS.
-
Press the Windows + R keys on your keyboard. This is going to bring up the Run utility.
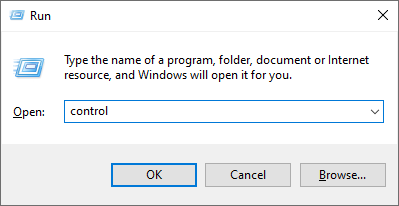
-
Type in “control” and press the Enter key on your keyboard. This will launch the classic Control Panel application.

-
Click on Network and Internet, then choose Network and Sharing Center.
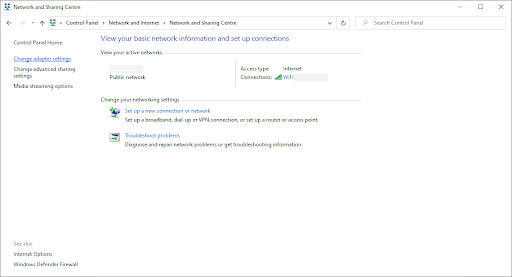
-
From the menu on the left side, click on the Change adapter settings link. This is going to open a new window.
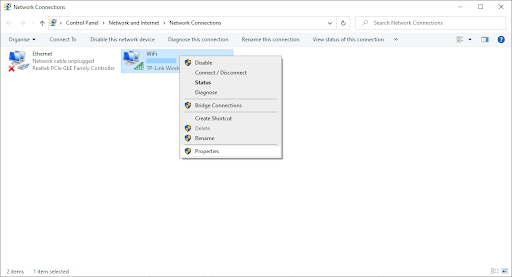
-
Right-click on the connection you’re currently using and select Properties.
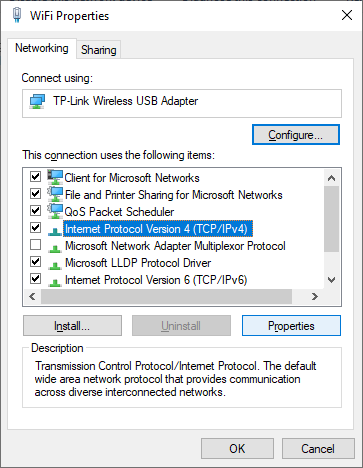
- Scroll down and click on Internet protocol version 4 (TCP/IPv4). Click on the Properties button.
-
Select Use the following DNS Server addresses.
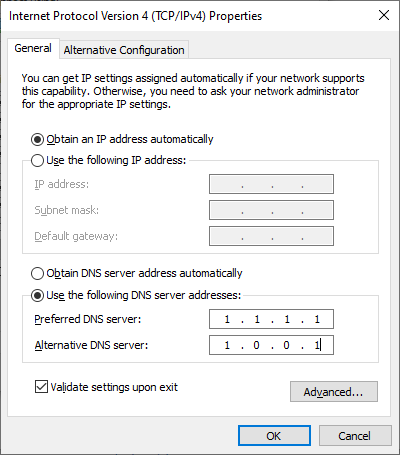
- Type 1.1.1.1 into the first row, then 1.0.0.1 into the second row. This will change your DNS to the popular 1.1.1.1 server, which you can read more about by clicking here.
- Click OK to apply your changes. Check if your internet speeds have improved after switching to a different DNS server.
Method 5. Adjust the Network Bandwidth settings
Windows 10 reserves about 20% of your bandwidth by default, making your internet feel sluggish. Luckily, you can adjust this feature to a better threshold, or entirely disable the reserve.
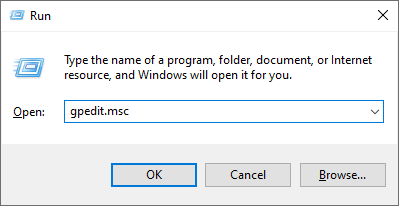
- Press the Windows + R keys on your keyboard. This is going to bring up the Run utility.
-
Type in “gpedit.msc” without the quotation marks and press the Enter key on your keyboard. This will launch the Group Policy editor.
-
Navigate to the following location: Computer Configuration → Administrative Templates → Network → QoS Packet Scheduler.
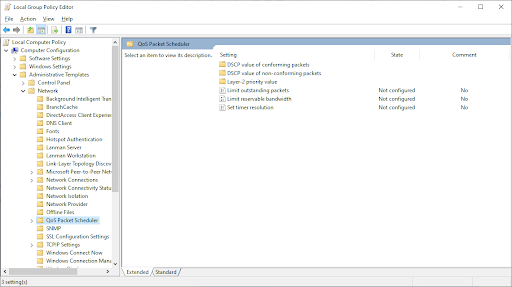
-
Double-click on the Limit reservable bandwidth setting. Make sure to switch the setting to Disabled, or manually edit the feature to a % you’re happy with.

- Click on the Apply button, and then restart your computer. See if your internet speed improves after making this change.
Method 6. Turn off Large Send Offload (LSO)
Large Send Offload (LSO) was intended to help with your internet performance but often ends up causing the opposite effect. To test if it conflicts with your connection, simply disable the feature.
-
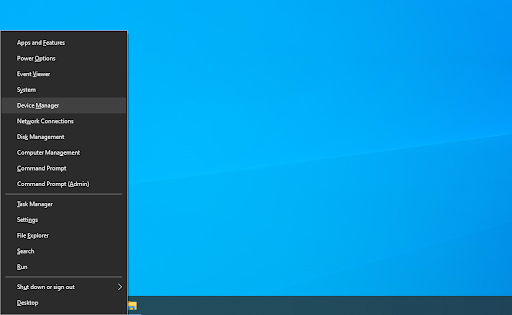
Press the Windows + X keys on your keyboard, and then choose Device Manager from the context menu.
-
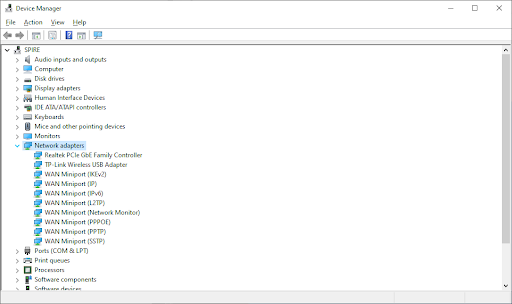
Expand the Network adapters section. Here, simply double-click on the adapter you’re currently using.

-
Switch to the Advanced tab, and then select Large Send Offload V2 (IPv4). Set the value to Disabled.

- Click OK and restart your computer for the changes to take place.
Method 7. Disable/Enable the Window Auto-Tuning feature
Window Auto-Tuning is a feature created to help optimize data transfers, making your network performance much better. However, in some cases, it may make your internet speed worse. Depending on the current state of the Window Auto-Tuning feature, try enabling or disabling it to test if the opposite helps.
- Press the Windows + R keys on your keyboard. This is going to bring up the Run utility.
-
Type in “cmd” without the quotation marks and press the Enter key on your keyboard. This will launch the classic Command Prompt application.

-
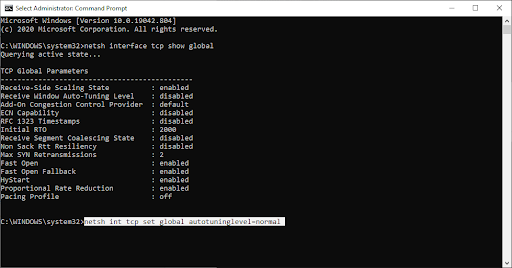
Type in the following command and press the Enter key to execute it: netsh interface tcp show global
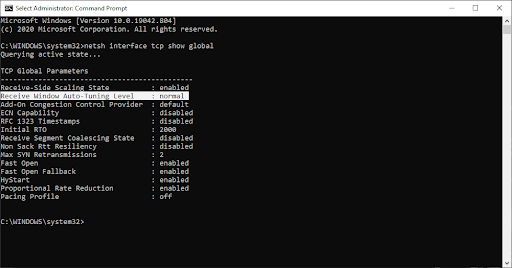
-
Check the “Receive Window Auto-Tuning Level” line.
-
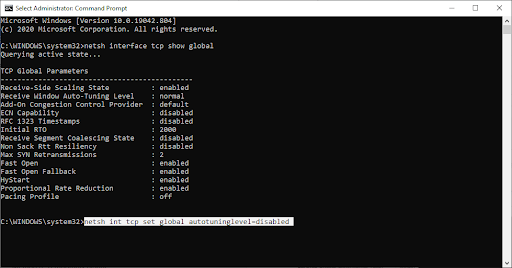
If the value is set to normal, input the following command and execute it by pressing Enter on your keyboard: netsh int tcp set global autotuninglevel=disabled
-
If the value is set to disabled, input the following command and execute it by pressing Enter on your keyboard: netsh int tcp set global autotuninglevel=normal
- After executing the correct command, close the Command Prompt and restart your computer. Check if your internet’s slow speed has improved.
Method 8. Temporarily disable your firewall
Some users have reported that the built-in Windows 10 firewall often causes issues with network performance, and in turn slowing down their internet. While disabling the firewall is not recommended, you can try turning it off temporarily to see if your internet speed is affected by it.
Warning: Make sure to have active antivirus software when performing this method! Without proper network protection, you’re putting your device at risk.
-
Press the Windows + R keys on your keyboard to launch the Run utility. Type in “firewall.cpl” (without the quotation marks) and click on the OK button.
-
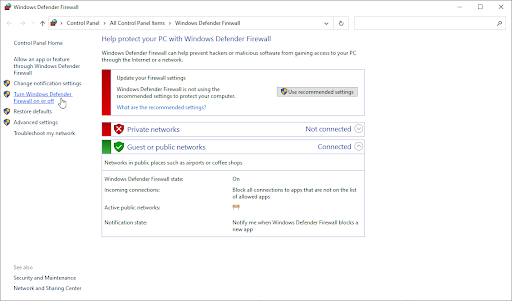
Click on the Turn Windows Defender Firewall on or off link, located on the left side of the window.
-
Make sure that you select the “Turn off...” option for both Private network settings and Public network settings.

- Click OK and restart your computer. Check if your internet speed has improved after disabling the firewall.
Method 9. Update the network adapter drivers
Regularly updating your driver software is something you should do all the time. Outdated network drivers can cause more trouble than you’d think.
In this solution, we will be using the integrated Device Manager to update the drivers for your network adapters.
-
Press the Windows + X keys on your keyboard, and then choose Device Manager from the context menu.

-
Expand the Network adapters section. Here, simply double-click on the adapter you’re currently using.
-
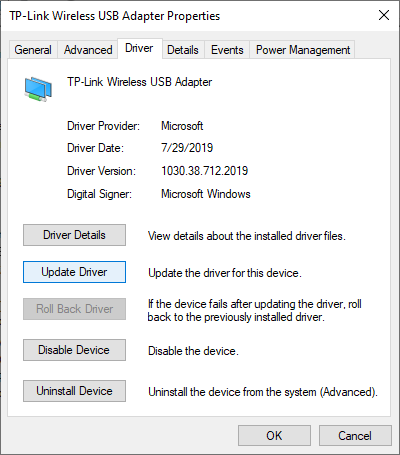
Switch to the Driver tab, and then click on the Update Driver button.
-
Select the method of updating your driver. You can either let Windows 10 search for a driver automatically or manually locate a new driver file already on your computer.
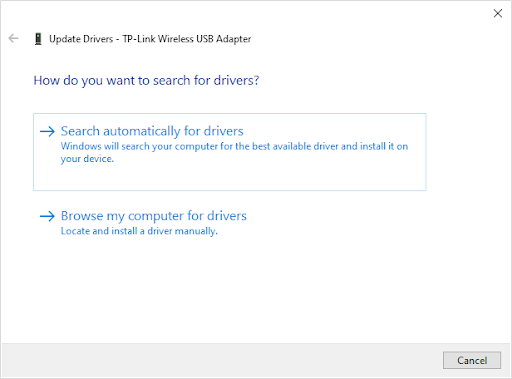
- Wait for the driver installation to complete. Repeat this for any other network adapter drivers you use, and see if the internet speed has improved.
If none of the methods above helped your case, we recommend getting in touch with your Internet Service Provider (ISP) to fix the issue. You may be required to upgrade your plan or replace your router. This will ensure you have a stable internet connection and rule out any ISP-side issue causing slowdowns.
Final thoughts
If you need any further help with Windows 10, don’t hesitate to reach out to our customer service team, available 24/7 to assist you. Return to us for more informative articles all related to productivity and modern-day technology!
Would you like to receive promotions, deals, and discounts to get our products for the best price? Don’t forget to subscribe to our newsletter by entering your email address below! Receive the latest technology news in your inbox and be the first to read our tips to become more productive.
You may also like
» How to Fix Slow Startup on Windows 10
» Avast Slowing Down Computer (Fixed)
» Discord Opening Links in Wrong Browser [Fix]