Have you ever heard of the blue screen of death in Windows? If you have heard of it then you know that the blue screen of death (BSOD) is an unwelcome sight.
If you haven’t heard of BSODs, here’s a hint: Blue Screens Of Death often appear when Microsoft Windows encounters a critical error from which it can’t recover. It is usually a result of low-level software (or drivers) crashing or faulty hardware.
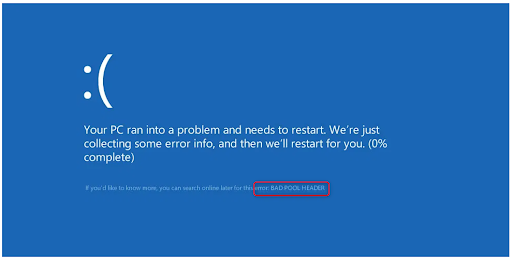
The Bad Pool Header (Bad Pool Header Error 0x00000019) is a common blue screen of death error on Windows, including Windows 10. But don’t worry it can be fixed!
Follow these simple methods in this article to fix the bad pool header blue screen error (0x00000019).
Jump to:
- Temporarily disable your third-party antivirus
- Disconnect external devices
- Undo recent changes using system restore
- Restart your computer in safe mode
- Run Windows Memory Diagnostic Tool to Test your RAM
- Disable Fast Startup
- Update drivers
- Clean Windows Registry
- Perform a clean boot
- Reset your PC
- Perform a Clean Windows Install
What is the Bad Pool Header Error
Bad pool header is often related to memory management issues. To understand what the bad pool header error message is (x00000019) let’s make it a little more meaningful.
‘Pool’ is the tool your OS uses to allocate memory. ‘Header’ is the tool that ensures that the Windows API (application programming interface) is properly addressed.
BAD POOL HEADER error message is a signal that your PC is having memory management issues. The memory issues can be software or hardware-related.
This error restarts or shuts down your computer to prevent any damage to your system. This is why when this error occurs, you find a message stating “Windows has been shut down to prevent damage to your computer”.
What causes bad pool header error?
The Bad Pool Header with error code 0x00000019 is one of the many Blue Screen of Death (BSOD) Errors that occur when Windows experience a problem with memory allocation.
The bad pool header errors can occur due to software or hardware related issues such as:
- Corrupted or incompatible device driver,
- Failing storage drive,
- Bad sectors,
- RAM errors or faulty HDD/SDD
- Faulty hardware
- Outdated drivers.
- Virus infection.
- Corrupted or damaged Windows system files.
Here is a case example:
My Windows Pc has been taking 30 minutes or so to start. I've tried repairing it several times but nothing seems to work and now I'm getting a blue screen that says "bad pool header". How do I fix a bad pool header error?
How how to fix bad pool header error
The following tools and methods can often help fix bad pool header errors and get Windows up and running again.
Solution #1: Temporarily disable your third-party antivirus
If you recently installed third-party antivirus software, it could be causing the bad pool header error. Or any update on the antivirus software can also cause the issue.
Many users have reported that temporarily disabling the antivirus software can help fix bad pool header errors. If this solves the problem and then in the next reboot (without disabling the software) you see the problem again, you can consider uninstalling the antivirus software.
Note: There is no need to worry about your Windows 10 Pc’s safety because it has the built-in Windows Defender guard to keep malware at bay if you have no other antivirus software.
Solution #2: Disconnect external devices
Connected external devices or peripherals might be interfering with your PC operating system. Disconnect or unplug such peripherals as flash drives, USB hubs, external hard drives, printers, webcams, etc. You may leave the mouse and/or keyboard.
Disconnect these external devices then restart the computer and check if you still receive the BAD POOL HEADER error. If the problem is resolved, you’ll know that one of the peripherals is damaged or faulty, thus causing the problem.
You can test them one by one to identify the specific external device and replace it.
Solution #3: Undo recent changes using system restore
System Restore can help you undo recent changes to your computer's system files that might have caused the bad pool header error. System Restore won’t affect your files, such as photos, documents, or email.
To conduct system restore:
- On the search button type System Restore.
- In the list of results, click System Restore (create a restore point on Windows 10). (If you're prompted for an administrator password or confirmation, type the password or provide confirmation).
-
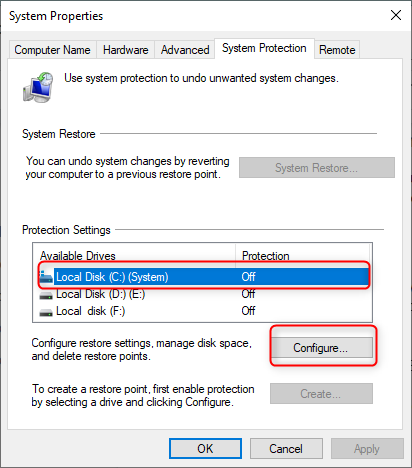
Under the "Protection Settings" section, select the main "System" drive, and click the Configure button.
-
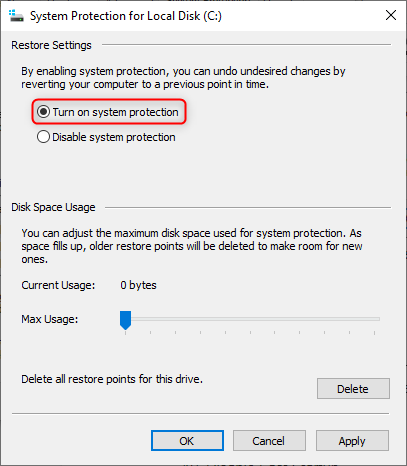
Select the option of Turn on system protection > Click Apply then click OK.
Once you complete the steps, Windows will create a restore point automatically when applying a new update or when specific system changes are made.
Any program or application, including malicious programs, that you may have installed unintentionally, will be removed from the system after the system restore.
Solution #4: Restart your computer in safe mode
Safe mode starts Windows in a limited state and starts only the basic files and drivers necessary to run Windows. This can help you troubleshoot any software problems on your PC.
For instance, if you have a program that runs as soon as you start Windows and can't be shut down when you start Windows in safe mode, you’ll be able to uninstall it.
To start your computer in safe mode:
- Remove all peripherals and external drives
- Next, click the Start button
- Hold the shift key and click Restart.
- Click the option Troubleshoot and then Advanced options.
- In the Advanced options” click Start-up Settings > Restart
- In the list of boot options choose option 4, [enable safe mode]
- Select an option by pressing one of the numbers or function keys F4, F5 or F6
In this mode, the operating system will be started with the bare minimum of installed drivers, and only the main Windows functions are used.
You’ll then log on to your computer with a user account that has administrator rights, and you'll see the words Safe Mode in the corners of your screen.
To exit safe mode, restart your computer and let Windows start normally, then see if the problem has been sorted.
Solution #5: Run Windows Memory Diagnostic Tool to Test your RAM
A faulty or damaged RAM could cause a bad pool header error.
You can test the state of your PC's RAM through the Windows Memory Diagnostic.
To check RAM with Windows Memory Diagnostic Tool:
- Press Windows + S
- In the search box type Memory Diagnostic.
- Click Windows Memory Diagnostic.
-
Close all the programs and then click ‘Restart now and check for problems (recommended)’.
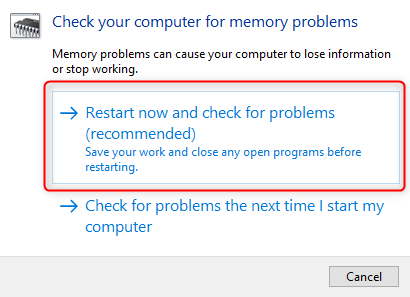
- Windows Memory Diagnostic Tool will start automatically. The testing process and results will be displayed on the screen. You can act on the errors that are found (if any).
Solution #6: Disable Fast Startup
Fast startup is a useful Windows feature (including Windows 10) that provides faster boot times on startup.
The Fast startup feature may be the reason for the bad pool header error and disabling it may fix the problem. To disable fast startup:
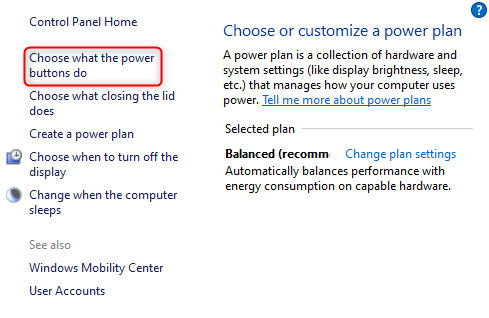
- Go to Search and type "power".
- Click power & sleep settings or "Choose power plan" depending on your OS
- Then click additional power settings (in windows 10)
-
Then click “Choose what the power button can do”
-
Click “Change settings that are currently unavailable” and then uncheck the “Turn on fast startup (recommended)” option (if it is enabled).

- Click “Save changes” to effect the changes made and see if the bad pool header eros has been fixed.
Solution #7: Check and Update device drivers
A damaged, outdated, or corrupted device driver can cause hardware errors, which can then lead to the "bad pool header" error.
Since drivers are a bridge between the hardware and the OS, lack of communication between the OS and the hardware due to issues on drivers, may either crash to protect other vital components of the system.
To update the device drivers:
- Start the system (Safe Mode)
- Right-click the start button > locate and open Device Manager.
-
In the Device Manager, locate Disk drive then right-click on it and choose Uninstall Driver.
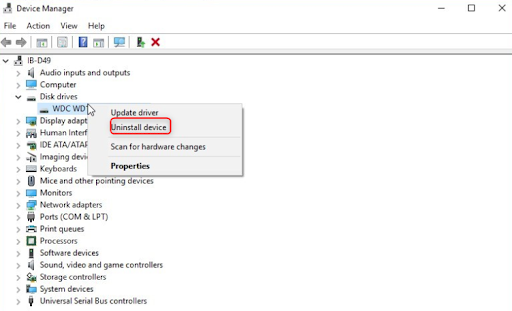
- Restart Windows and the drivers will be reinstalled from Windows updates.
- Alternatively, you may choose to update the drivers manually. Just right-click on the drive in Device Manager then choose Update Driver. You can do this for all the drivers.
Note: Ensure, all drivers are in the Device Manager updated before you proceed.
Solution #8: Clean Windows Registry
If your registry is corrupted it may be the cause of the Bad Pool Header screen. You need to check to clean the windows registry to ensure that there are no corrupted files.
Note: editing the registry files is a procedure to be carried out only by an advanced user. If you are not skilled, you may damage your system beyond repair.
Alternatively, you can use special software to modify your Windows Registry.
Solution #9: Perform a clean boot
Performing a clean boot on your Windows 10 operating system can also help fix bad pool header errors. A clean boot also starts Windows with a minimal set of drivers and startup programs like safe mode.
This way you can eliminate software conflicts, which occur when you install an update or a program, or when you run an incompatible program in Windows.
A clean boot helps to disable all third-party applications and services so that you can ascertain if any of them is causing the bad pool header error.
To perform a clean boot:
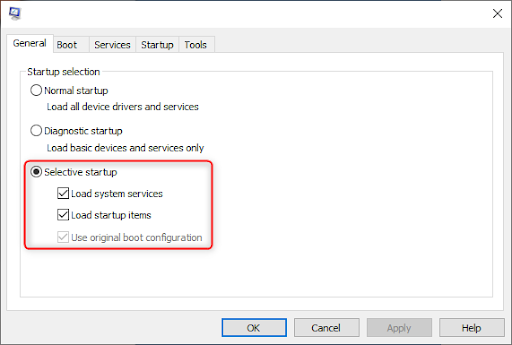
- Open search and type "system configuration" or run MSConfig and click Ok
-
Open the System Configuration desktop app. Another way to access System.
-
Select “Selective startup” then unmark "Load startup items".
- Go to the "Services" tab and mark the "Hide all Microsoft services" checkbox. This will hide Microsoft apps and services (because you need to disable only third-party applications).
-
Click "Disable all" > then click Apply > then click Ok to save the changes and exit system config.
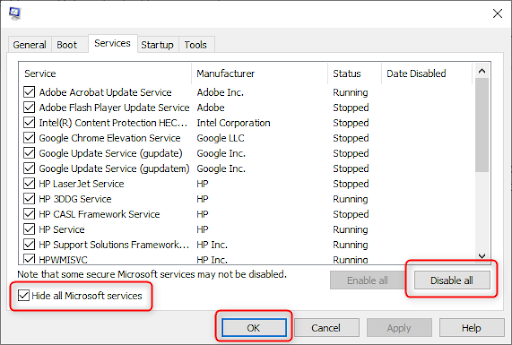
- Windows will inform you that you need to restart the computer to apply the changes. Choose if you want to restart now or manually later.
Solution #10: Reset your PC
Your Windows OS might need a fresh start to fix the Bad Pool Header error.
To reset your PC in Windows 10,
- Click Start > Go to the Settings > select Update & security
- Navigate to Reset this PC then Get started
- If your data is very important, choose to keep your files, otherwise, you can choose to remove everything, or to restore factory settings.
Note: the last two options imply wiping your files off your PC. you can back up your files in the cloud for instance before resetting your PC.
Solution #11: Replace hardware or Perform a Clean Windows Install
If you haven’t had the luck to fix the bad pool header there are two things left to do: replace your HDD/SSD hardware or perform a clean OS install. These seem to be the last resort.
Wrapping up
We hope your Windows 10 memory issues have been solved and you have fixed the bad pool header with error code 0x00000019.
Fed up with your slow PC? Tired of waiting for Windows to startup? Want a new Windows OS? Take a look at the most common reasons behind poor performance and the best ways to deal with Windows issues here.
Next read
> Fix “Windows Update components must be repaired” Error on Windows 10
> Fix “We can't sign into your account” Error on Windows 10
> Fixed: “There is a problem with this Windows installer package” error